Notice: unserialize(): Error at offset 0 of 134 bytes in /home/biogassolutionsc/public_html/plugins/system/bdthemes_shortcodes/shortcodes/mailchimp/MCAPI.class.php on line 2902
BIO-SLURRY APPLICATIONS https://www.biogassolutions.co.ug Wed, 27 May 2026 18:48:10 +0000 Biogas Solutions Uganda Limited is a private company limited by guarantee managed jointly by Hivos and SNV as a component of the African Biogas Partnership Programme (ABPP) funded by the Netherlands Ministry of Foreign Affairs. en-gb Banana Growing https://www.biogassolutions.co.ug/index.php/bio-slurry-applications/item/9-banana-growing https://www.biogassolutions.co.ug/index.php/bio-slurry-applications/item/9-banana-growing Banana Growing

[heading style="1" size="32" sub_heading="01" sh_size="20"]PLANTING[/heading]

[spacer size="10"] [row] [column size="1"] [row_inner] [column_inner size="1/1"] [animate type="fadeInDown" duration="1" delay="0.5" inline="no"]

  • Dig a 2ft (wide) x 2ft (deep) pit.
  • Mix 1 (composted bio-slurry) : 1 (black loam soil).
  • Plant the banana sucker at ¾ pit depth.
  • Water the sucker, then mulch.

[/column] [column size="1/1"] [spacer size="20"]

[heading style="1" size="32" sub_heading="02" sh_size="20"]GROWING PLANTS[/heading]

[spacer size="10"] [row] [column size="1"] [row_inner] [column_inner size="1/1"] [animate type="fadeInDown" duration="1" delay="0.5" inline="no"]

    • Dig a canal around the plant roots, 2-3 ft from the stem.
    • Canal size; 1ft (wide) x 1ft (deep)
    • Fill canal with either liquid or bio-slurry compost.
    • Cover with soil, then mulch.

[/column] [/row] [spacer] [row] [column size="1/3"] [/column] [column size="1/3"] [/column] [column size="1/3"] [/column] [/row] [spacer size="20"]

[heading style="1" size="32" sub_heading="03" sh_size="20"]SPRAYING[/heading]

[spacer size="10"] [row] [column size="1"] [row_inner] [column_inner size="1/1"] [animate type="fadeInDown" duration="1" delay="0.5" inline="no"]

[/column] [column size="1/1"]

[heading style="1" size="32" sub_heading="04" sh_size="20"]GOOD PLANT & YIELDS[/heading]

[spacer size="10"] [row] [column size="1"] [row_inner] [column_inner size="1/1"] [animate type="fadeInDown" duration="1" delay="0.5" inline="no"]

[/column] [column size="1/1"]

]]>
hustlazb@yahoo.com (adminbsul) BIO-SLURRY APPLICATIONS Tue, 04 Aug 2015 06:29:00 +0000
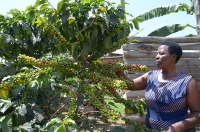
Coffee Growing https://www.biogassolutions.co.ug/index.php/bio-slurry-applications/item/8-coffee-growing https://www.biogassolutions.co.ug/index.php/bio-slurry-applications/item/8-coffee-growing Coffee Growing

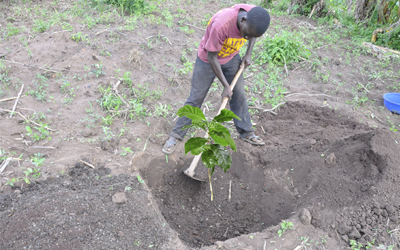
[heading style="1" size="32" sub_heading="01" sh_size="20"]PLANTING[/heading]

[spacer size="10"] [row] [column size="1"] [row_inner] [column_inner size="1/1"] [animate type="fadeInDown" duration="1" delay="0.5" inline="no"]

  • Dig a 2ft (wide) x 2ft (deep) pit.
  • Mix 1 (composted bio-slurry) : 1 (black loam soil).
  • Plant the coffee seedling at ¾ pit depth.
  • Water the seedling, then mulch.

[/column] [column size="1/1"] [spacer size="20"]

[heading style="1" size="32" sub_heading="02" sh_size="20"]GROWING PLANTS[/heading]

[spacer size="10"] [row] [column size="1"] [row_inner] [column_inner size="1/1"] [animate type="fadeInDown" duration="1" delay="0.5" inline="no"]

    • Dig a canal around the plant roots, 2-3 ft from the stem.
    • Canal size; 1ft (wide) x 1ft (deep)
    • Fill canal with either liquid or bio-slurry compost.
    • Cover with soil, then mulch.

[/column] [/row] [spacer] [row] [column size="1/3"] [/column] [column size="1/3"] [/column] [column size="1/3"] [/column] [/row] [spacer size="20"]

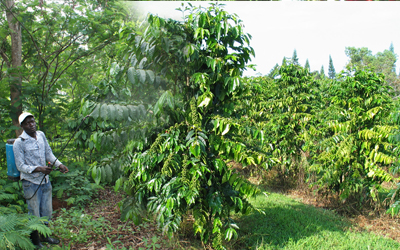
[heading style="1" size="32" sub_heading="03" sh_size="20"]CONTROL OF INSECT PESTS[/heading]

[spacer size="10"] [row] [column size="1"] [row_inner] [column_inner size="1/1"] [animate type="fadeInDown" duration="1" delay="0.5" inline="no"]

[/column] [column size="1/1"]

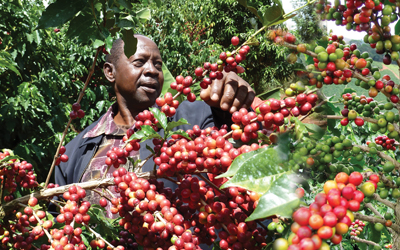
[heading style="1" size="32" sub_heading="04" sh_size="20"]GOOD COFFEE YIELDS[/heading]

[spacer size="10"] [row] [column size="1"] [row_inner] [column_inner size="1/1"] [animate type="fadeInDown" duration="1" delay="0.5" inline="no"]

[/column] [column size="1/1"]

]]>
hustlazb@yahoo.com (adminbsul) BIO-SLURRY APPLICATIONS Tue, 04 Aug 2015 06:28:00 +0000
Coffee Seedling Propagation https://www.biogassolutions.co.ug/index.php/bio-slurry-applications/item/7-coffee-seedling-propagation https://www.biogassolutions.co.ug/index.php/bio-slurry-applications/item/7-coffee-seedling-propagation Coffee Seedling Propagation

[heading style="1" size="32" sub_heading="01" sh_size="20"]NURSERY BED FERTILIZATION[/heading]

[spacer size="10"] [row] [column size="1"] [row_inner] [column_inner size="1/1"] [animate type="fadeInDown" duration="1" delay="0.5" inline="no"]

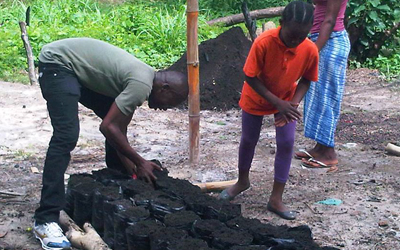
  • Prepare 4ft (wide) x 10ft (long) beds.
  • Mix 1 (composted bio-slurry) : 10 (black loam soil).
  • Plant the coffee beans at shallow depth.
  • Water the beds, then mulch.

[/column] [/row] [spacer] [row] [column size="1/2"] [/column] [column size="1/2"] [/column] [/row] [spacer size="20"]

[heading style="1" size="32" sub_heading="02" sh_size="20"]POTTING MEDIA PREPARATION[/heading]

[spacer size="10"] [row] [column size="1"] [row_inner] [column_inner size="1/1"] [animate type="fadeInDown" duration="1" delay="0.5" inline="no"]

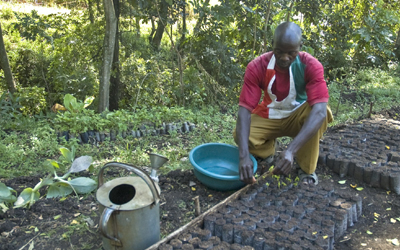
    • Mix 1 (composted bio-slurry) : 10 (black loam soil).
    • Fill the potting bags with the mixed media.
    • Transplant two leafed seedlings from the beds into the pots.

[/column] [/row] [spacer] [row] [column size="1/2"] [/column] [column size="1/2"] [/column] [/row] [spacer size="20"]

[heading style="1" size="32" sub_heading="03" sh_size="20"]FERTILIZATION, WATERING AND CONTROL OF INSECT PESTS[/heading]

[spacer size="10"] [row] [column size="1"] [row_inner] [column_inner size="1/1"] [animate type="fadeInDown" duration="1" delay="0.5" inline="no"]

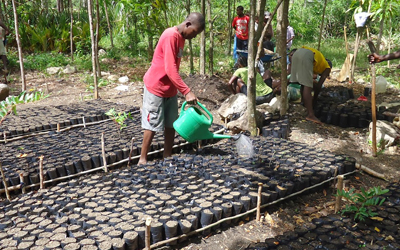
    • Mix 1 (liquid bio-slurry) : 2 (water).
    • Filter mixture to remove impurities.
    • Spray onto the seedlings.

[/column] [column size="1/1"]

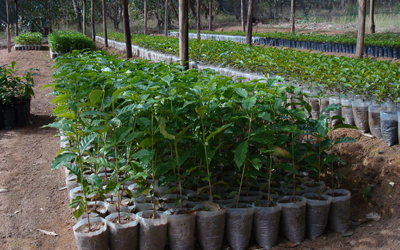
[heading style="1" size="32" sub_heading="04" sh_size="20"]GOOD COFFEE SEEDLINGS[/heading]

[spacer size="10"] [row] [column size="1"] [row_inner] [column_inner size="1/1"] [animate type="fadeInDown" duration="1" delay="0.5" inline="no"]

[/column] [column size="1/1"]

]]>
hustlazb@yahoo.com (adminbsul) BIO-SLURRY APPLICATIONS Tue, 04 Aug 2015 06:28:00 +0000
Fish Pond Fertilization https://www.biogassolutions.co.ug/index.php/bio-slurry-applications/item/6-fish-pond-fertilization https://www.biogassolutions.co.ug/index.php/bio-slurry-applications/item/6-fish-pond-fertilization Fish Pond Fertilization

[heading style="1" size="32" sub_heading="01" sh_size="20"]POND PREPARATION[/heading]

[spacer size="10"] [row] [column size="1"] [row_inner] [column_inner size="1/1"] [animate type="fadeInDown" duration="1" delay="0.5" inline="no"]

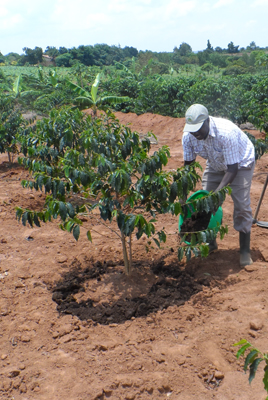
  • Disinfect new or old pond for restocking by pouring in lime at 225kg per 1,000 m2 pond area.
  • Add 20kg of bio-slurry per 1,000 m2 of pond area to fertilize the pond.
  • Leave the pond to stand for at least 1 week, then add water.
  • Stock the pond when the water turns green.

[/column] [column size="1/1"] [spacer size="20"]
[heading style="1" size="32" sub_heading="02" sh_size="20"]STOCKED POND[/heading]

[spacer size="10"] [row] [column size="1"] [row_inner] [column_inner size="1/1"] [animate type="fadeInDown" duration="1" delay="0.5" inline="no"]

    • Tie 0.3-0.4 kg of either liquid or composted bio-slurry per m2 of water surface in a porous sack.
    • Suspend the sack in the water inlet corner of the pond.
    • Allow the bio-slurry to dissolve slowly into the water, hence fertilizing the pond.

[/column] [column size="1/1"] [spacer size="20"]

[heading style="1" size="32" sub_heading="03" sh_size="20"]FISH GROWTH[/heading]

[spacer size="10"] [row] [column size="1"] [row_inner] [column_inner size="1/1"] [animate type="fadeInDown" duration="1" delay="0.5" inline="no"]

[/column] [column size="1/1"]

[heading style="1" size="32" sub_heading="04" sh_size="20"]GOOD FISH HARVEST[/heading]

[spacer size="10"] [row] [column size="1"] [row_inner] [column_inner size="1/1"] [animate type="fadeInDown" duration="1" delay="0.5" inline="no"]

[/column] [column size="1/1"]

]]>
hustlazb@yahoo.com (adminbsul) BIO-SLURRY APPLICATIONS Tue, 04 Aug 2015 06:23:00 +0000
Fruit Growing https://www.biogassolutions.co.ug/index.php/bio-slurry-applications/item/5-fruit-growing https://www.biogassolutions.co.ug/index.php/bio-slurry-applications/item/5-fruit-growing Fruit Growing

[heading style="1" size="32" sub_heading="01" sh_size="20"]PLANTING[/heading]

[spacer size="10"] [row] [column size="1"] [row_inner] [column_inner size="1/1"] [animate type="fadeInDown" duration="1" delay="0.5" inline="no"]

  • Dig a 2ft (wide) x 2ft (deep) pit.
  • Mix 1 (composted bio-slurry) : 1 (black loam soil).
  • Plant the fruit seedling at ¾ pit depth.
  • Water the seedling, then mulch.

[/column] [column size="1/1"] [spacer size="20"]

[heading style="1" size="32" sub_heading="02" sh_size="20"]GROWING PLANTS[/heading]

[spacer size="10"] [row] [column size="1"] [row_inner] [column_inner size="1/1"] [animate type="fadeInDown" duration="1" delay="0.5" inline="no"]

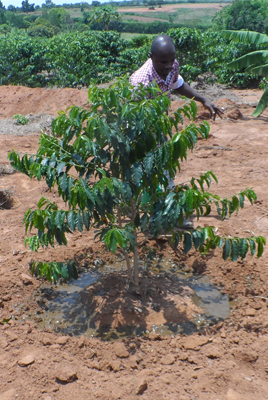
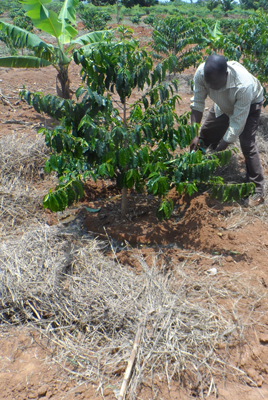
    • Dig a canal around the plant roots, 2-3 ft from the stem.
    • Canal size; 1ft (wide) x 1ft (deep)
    • Fill canal with either liquid or bio-slurry compost.
    • Cover with soil, then mulch.

[/column] [/row] [spacer] [row] [column size="1/3"] [/column] [column size="1/3"] [/column] [column size="1/3"] [/column] [/row] [spacer size="20"]
[heading style="1" size="32" sub_heading="03" sh_size="20"]CONTROL OF INSECT PESTS[/heading]

[spacer size="10"] [row] [column size="1"] [row_inner] [column_inner size="1/1"] [animate type="fadeInDown" duration="1" delay="0.5" inline="no"]

    • Mix 1 (Liquid bio-slurry) : 2 (water).
    • Filter mixture to remove impurities.
    • Spray the mixture onto the crops.

[/column] [column size="1/1"] [spacer size="20"]

[heading style="1" size="32" sub_heading="04" sh_size="20"]GOOD FRUIT YIELDS[/heading]

[/column] [/row] [spacer="10"] [row] [column size="1/2"] [/column] [column size="1/2"] [/column] [/row] [spacer size="20"]

]]>
hustlazb@yahoo.com (adminbsul) BIO-SLURRY APPLICATIONS Tue, 04 Aug 2015 06:21:00 +0000
Mushroom Growing https://www.biogassolutions.co.ug/index.php/bio-slurry-applications/item/4-mushroom-growing https://www.biogassolutions.co.ug/index.php/bio-slurry-applications/item/4-mushroom-growing Mushroom Growing

[heading style="1" size="32" sub_heading="01" sh_size="20"]PREPARATION OF GROWTH MEDIA (SUBSTRATE)[/heading]

[spacer size="10"] [row] [column size="1"] [row_inner] [column_inner size="1/1"] [animate type="fadeInDown" duration="1" delay="0.5" inline="no"]

  • Mix 1 (bio-slurry compost) : 3 (substrate-cotton seed husks, bean hulls, dry banana leaves).
  • Soak the mixture for 1-3 days. • Drain water for 45-60 minutes.
  • LSteam for 2-3 hours, cool on a clean tarpaulin or polythene sheet ready for inoculation.

[/column] [column size="1/1"] [spacer size="20"]

[heading style="1" size="32" sub_heading="02" sh_size="20"]SUBSTRATE INOCULATION[/heading]

[spacer size="10"] [row] [column size="1"] [row_inner] [column_inner size="1/1"] [animate type="fadeInDown" duration="1" delay="0.5" inline="no"]

    • Inoculate (sowing) the substrate with spawn (mushroom seeds) in a black polythene bag.
    • Suspend the mushroom gardens in a dark room and follow the routine management practices.

[/column] [column size="1/1"] [spacer size="20"]

[heading style="1" size="32" sub_heading="03" sh_size="20"]GROWTH[/heading]

[spacer size="10"] [row] [column size="1"] [row_inner] [column_inner size="1/1"] [animate type="fadeInDown" duration="1" delay="0.5" inline="no"]

[/column] [column size="1/1"]

[heading style="1" size="32" sub_heading="04" sh_size="20"]GOOD MUSHROOM PLANTS AND YIELDS[/heading]

[spacer size="10"] [row] [column size="1"] [row_inner] [column_inner size="1/1"] [animate type="fadeInDown" duration="1" delay="0.5" inline="no"]

[/column] [column size="1/1"]

]]>
hustlazb@yahoo.com (adminbsul) BIO-SLURRY APPLICATIONS Tue, 04 Aug 2015 06:19:00 +0000